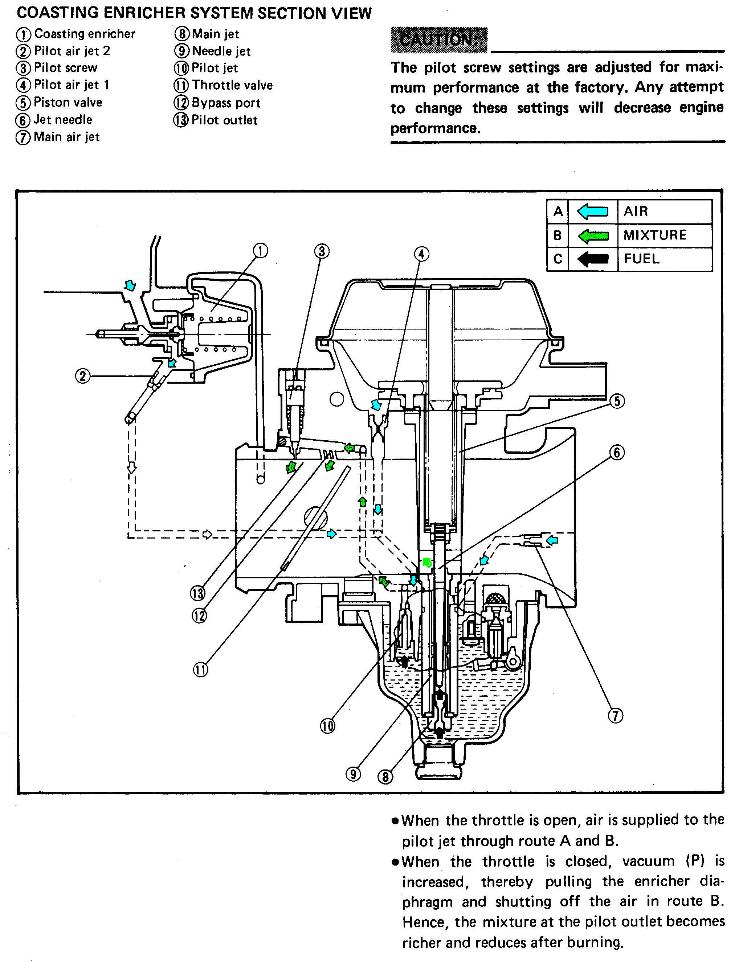
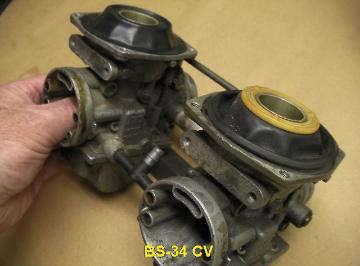
Yamaha SX, TX650, TX750, Venture, & Kawasaki KZ-750, XS500 Carburetor Diaphragms for Mikuni BS38, BS36, BS34, BS34SS, & BS32 CV constant velocity carburetors. This easy to install part can cure engine stuttering, unwanted acceleration, uneven and unbalanced carburetors caused by leaking or worn diaphragms.
If you think you have BS34SS carburetors: be sure to measure to groove OD. Do not trust manuals, spec sheets, or other owners. MEASURE!
ORDER: MIKUNI BS38-CV Diaphragms if you have a Yamaha 650 twin made from 1970 thru end of 1979, or early XS1100 M-77 Later used 73mm diameter BS34. Measure!
ORDER MIKUNI BS34-CV Diaphragms if you have a Yamaha 650 twin made in 1980 until end of production. M-73
BS38CV fits these models that we know of:
Yamaha XS-650 1970-thru 79
XS 650 A,B,C,D,E,F,SE,SF
TX-650 XS-1, XS-2, XS500
XS1100 EARLY & BS34 Fit later models.
KAWASAKI KZ-750 Twins
Note: There are 2 types of BS36CV carbs, and could be fitted with 77 or 73mm diameter.
Note: BS36 CV carbs were used on certain
FJ1200, 86-93
XJR 1200-1300
XJ900 F
Please measure OD of Diaphragm to be sure.
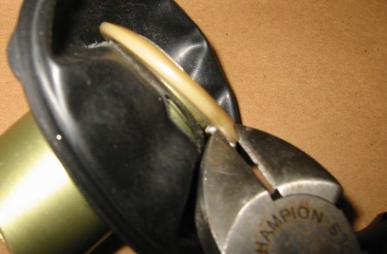
Yamaha Venture Notes: The 73 mm Mikuni Diaphragm fits the Venture models even with plastic slides. Remove the short metal tube from the plastic slide if loose, and remove the rings. Place the JBM Industries diaphragm on the metal tube, and then push tube into the plastic slide. Use Super Glue on metal tube. If metal insert tube is not loose, just cut the rings off plastic slide with side cutters as shown.
Mikuni SIZES we have at this time:
BS38CV 77mm OD of Diaphragm
BS36CV 73mm or 77mm OD of Diaphragm
BS34CV 73mm OD of Diaphragm
BS34SS & BS32 70mm OD of Diaphragm
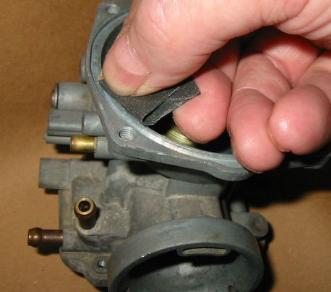
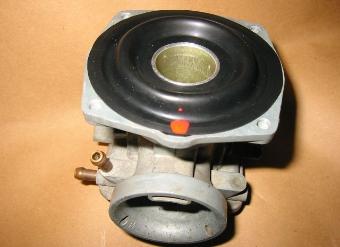
The first step to install the new diaphragms is to cut both the plastic retaining washers from the original slides as shown. (Remove stuck slides by placing carburetor body under a 100 watt lamp to warm it and soften varnish.)
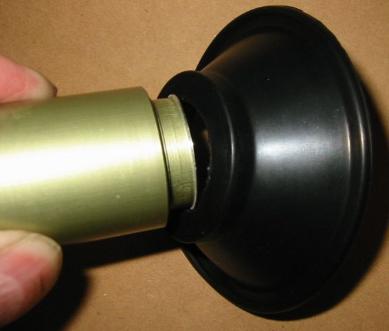
Install the new diaphragm by pushing it over the lip on the old throttle slide as shown. Hard rubber tire fits tightly to slide. We are asked about adhesive on this part, and "Super Glue" will work. Do not use other adhesives.
Use fine sandpaper or Scotch-bright pad to clean the mechanical lock groove and remove any sharp corners that might cut the diaphragm.
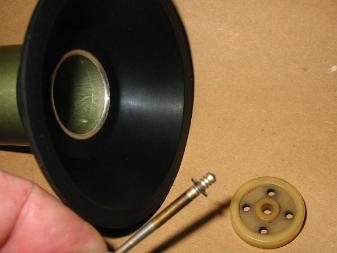
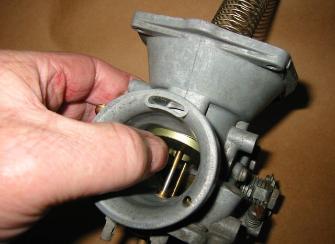
Install your needle and clip as shown here.
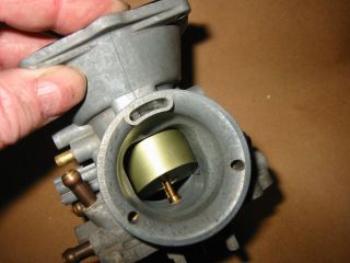
Position the throttle slide and diaphragm as shown with the cut-away facing the open mouth of the carburetor. Roll the diaphragm a bit to push it into the groove.
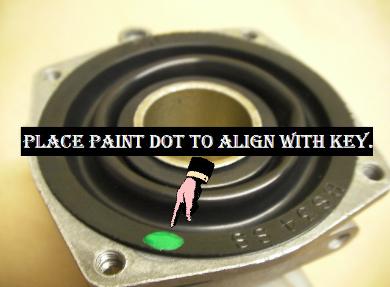
Place a dot of paint at the "key" tab location for easy future removal and positioning.
Place the slide return spring and check that the diaphragm rolls properly.
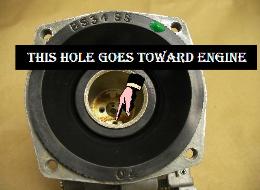
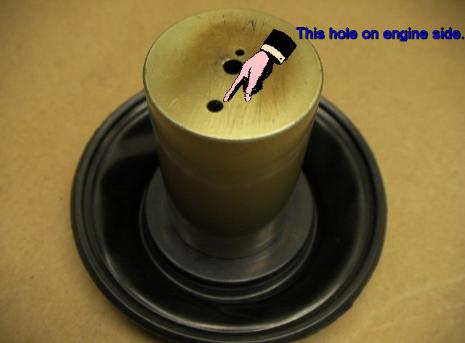
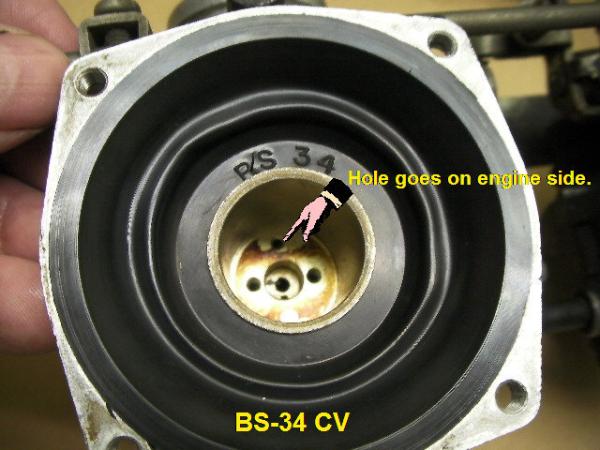
Special note when installing BS34CV & BS34SS Diaphragms and Slides: While your BS34 slide may not have a cut-away as shown on the BS38 above, it is important that the vacuum hole is positioned towards the engine side.
M-73 Diaphragm
M-73 Diaphragm
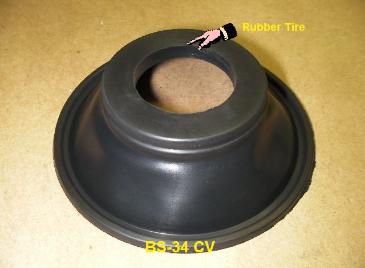
The "Hard Rubber Tire" is what holds the diaphragm to the slide.
BS34SS CV Carb has a 70 mm diaphragm
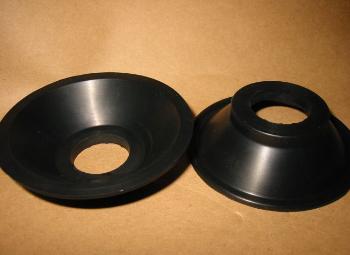
S34SS CV Carburetor Diaphragm is shown above and below. The outer diameter of this diaphragm is 70 mm. (Part M-70)
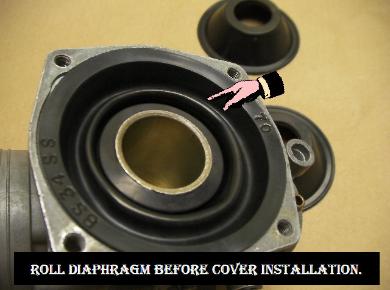
Roll before spring and cover Installation. (Part M-70)